View Communication Patterns in SwiftUI
Every iOS app consists of many objects that need to communicate with each other to get the job done. Apart from its layout system and declarative DSL, SwiftUI introduces new communication patterns between views. In this article, we will study all the available options, and look at some best practices regarding when you should use which mechanism.
From Parent to Direct Child – Use Initializer
The most common way of transferring data in SwiftUI is from a parent view to its direct child. The parent just instantiates the child and passes data to its initializer.
Given a todo app with following views hierarchy:

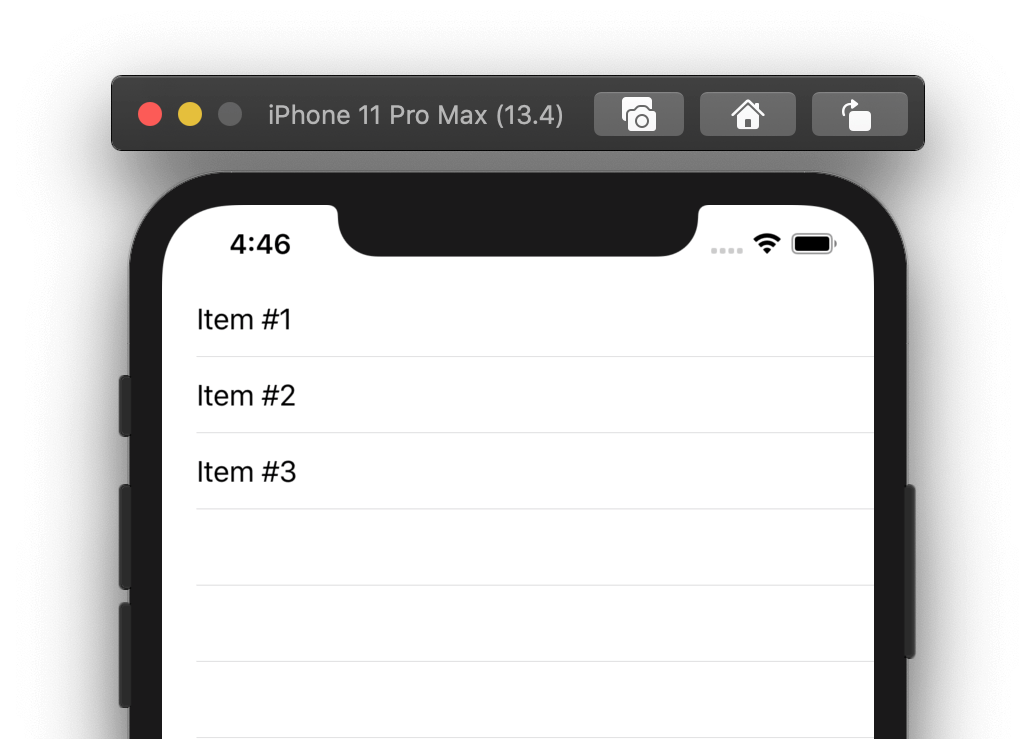
Here is how we can send a list of todo items from ContentView to TodoListView:
struct ContentView: View {
    let items = [
        TodoItem(title: "Item #1"),
        TodoItem(title: "Item #2"),
        TodoItem(title: "Item #3")
    ]

    var body: some View {
        TodoListView(items: items)
    }
}

struct TodoListView: View {
    let items: [TodoItem]
    ...
}
Similarly, we can pass a TodoItem from the list to an individual row:
struct TodoListView: View {
    let items: [TodoItem]

    var body: some View {
        List(items) { item in
            TodoItemView(item: item)
        }
    }
}

struct TodoItemView: View {
    let item: TodoItem

    var body: some View {
        Text(item.title)
    }
}

The result looks next:
From Parent to Distant Child – Use Environment
Often we have dependencies that are required by some views within a hierarchy, but not all of them. Imagine that we need to pass an image cache from the app composition root (aka SceneDelegate) to TodoItemDetail:

If we pass an image cache via initializer, we will create 3 unnecessary levels of indirection and couple all intermediate views to the image cache. This sounds bad.
Luckily, SwiftUI offers a solution out-of-the-box. Meet Environment, which is essentially a dictionary with app-wide preferences. SwiftUI passes it automatically from a parent view to its children. Environment allows us to insert arbitrary values into a view hierarchy and read them only when necessary.
Let’s see how we can inject an image cache to an environment. It is implemented as follows:
protocol ImageCache {
    subscript(_ key: String) -> UIImage? { get set }
}

struct TemporaryImageCache: ImageCache {
    private let cache = NSCache<NSString, UIImage>()

    subscript(_ key: String) -> UIImage? {
        get { cache.object(forKey: key as NSString) }
        set { newValue == nil ? cache.removeObject(forKey: key as NSString) : cache.setObject(newValue!, forKey: key as NSString) }
    }
}
Now add an image cache to the environment:
struct ImageCacheKey: EnvironmentKey {
    static let defaultValue: ImageCache = TemporaryImageCache()
}

extension EnvironmentValues {
    var imageCache: ImageCache {
        get { self[ImageCacheKey.self] }
        set { self[ImageCacheKey.self] = newValue }
    }
}
We can read a value from an environment using the @Environment property wrapper:
struct TodoItemDetail: View {
    let item: TodoItem
    @Environment(\.imageCache) var cache: ImageCache

    var body: some View {
        ...
    }
}
Note that the default image cache will be created when we access it for the first time via @Environment.
From Child to Direct Parent – Use Bindings and Callbacks
There are two ways of passing data from a child to its direct parent – using bindings and callbacks. Here are some rational to make the choice:
- When we need to pass data in one way – use a callback.
- When we need to pass data in two ways – use
@Binding.
Callbacks
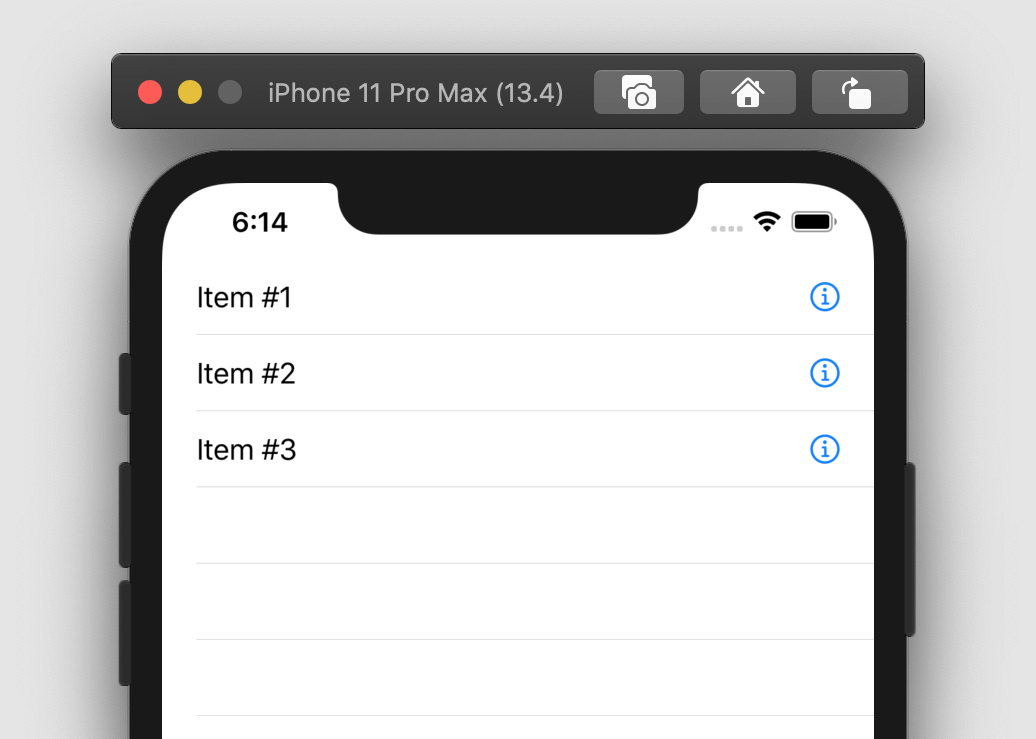
An obvious use case for the callback mechanism is buttons. Say, we want to add an info button to a todo list row:
And handle button action in the todo list row:
struct TodoItemView: View {
    let item: TodoItem

    var body: some View {
        HStack {
            Text(item.title)
            Spacer()
            Button(action: onDetail) {
                Image(systemName: "info.circle").foregroundColor(.blue)
            }
        }
    }

    func onDetail { ... }
}
Or we can decide to handle tap events in the todo list:
struct TodoListView: View {
    let items: [TodoItem]

    var body: some View {
        List(items) { item in
            TodoItemView(item: item) {
                print("Detail selected", item)
            }
        }
    }
}

struct TodoItemView: View {
    let onDetail: () -> Void
    ...

    var body: some View {
        ...
        Button(action: onDetail) { ... }
    }
}
The call chain looks next:

Bindings
@Binding allows us to declare a property that is owned by a parent but can be changed both by the parent and the child, effectively passing that change back and forth.
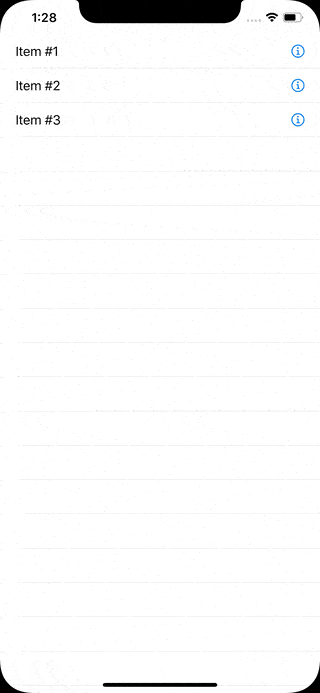
For an API that uses binding, we are going to look at the sheet(item:content:) method that presents a modal sheet. Here is how we can use it to display a todo item details:
struct TodoListView: View {
    let items: [TodoItem]
    @State var itemDetailSelection: TodoItem?

    var body: some View {
        List(items) { item in
            TodoItemView(item: item) {
                self.itemDetailSelection = item
            }
        }
        .sheet(item: $itemDetailSelection) { item in
            TodoItemDetail(item: item)
        }
    }
}
The result looks next:
From Child to Distant Parent – Use PreferenceKey
SwiftUI has a preference system that enables us to pass key-value pairs up the view hierarchy. The process is next:
- Implement custom
PreferenceKey, which is a named value produced by a view. - In a child view, attach a key-value pair.
- In a parent view, attach a callback that keeps track of changes to this preference.
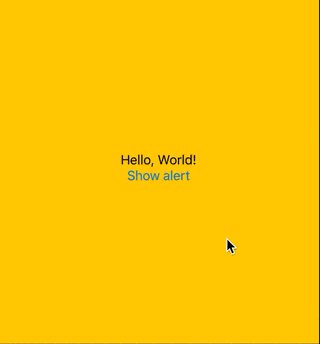
As an example, consider how we can use SwiftUI view preferences to show an alert. Let’s begin with the implementation of the preference key:
struct AlertPreferenceKey: PreferenceKey {
    static var defaultValue: PresentableAlert?

    static func reduce(value: inout PresentableAlert?, nextValue: () -> PresentableAlert?) {
        value = nextValue()
    }
}
The PreferenceKey protocol has two requirements. We must provide the default value for a preference and a reduce() method that combines all child values into a single one visible to their parent [1]. Therefore, in the reduce() method, we store the latest provided value.
PresentableAlert is defined as follows:
struct PresentableAlert: Equatable, Identifiable {
    let id = UUID()
    let title: String
    let message: String?

    static func == (lhs: PresentableAlert, rhs: PresentableAlert) -> Bool {
        lhs.id == rhs.id
    }
}
Conformance to the Equatable protocol is important since it allows SwiftUI to determine diffs and call the parent only when preferences have changed. With AlertPreferenceKey in place, we can now use preference(key:value:) to pass an alert up the view tree:
struct ViewWithAlert: View {
    @State private var alert: PresentableAlert?

    var body: some View {
        Button("Show alert", action: { self.alert = PresentableAlert(title: "Title", message: "Message") })
            .preference(key: AlertPreferenceKey.self, value: alert)
    }
}
Now we can use onPreferenceChange() to read an alert from the current view tree. Note that ContentView is a distant parent of ViewWithAlert:
struct ContentView: View {
    @State private var alert: PresentableAlert?

    var body: some View {
        HelloWorldView()
            .onPreferenceChange(AlertPreferenceKey.self) { self.alert = $0 }
            .alert(item: $alert) { alert in
                Alert(title: Text(alert.title), message: alert.message.map(Text.init))
        }
    }
}

struct HelloWorldView: View {
    var body: some View {
        ZStack {
            Color.yellow
            VStack {
                Text("Hello, World!")
                ViewWithAlert()
            }
        }
    }
}
The result is next:
Between Children – Lift the State Up
To pass data between siblings, we need to lift the state one level up and use their parent view as a middleman.
As an example, we will consider a Toggle and Button with a synchronized state:

And here is the code:
struct ContentView: View {
    // 1.
    @State var isOn = false

    var body: some View {
        VStack {
            // 2.
            Toggle(isOn: $isOn) { EmptyView() }
                .labelsHidden()

            // 3.
            Button(action: { self.isOn.toggle() }) {
                self.isOn ? Text("Turn Off") : Text("Turn On")
            }
        }
    }
}
Here is what we are doing:
- Create
@Statein a parent view. - Use binding to pass the state to the toggle and allow the toggle to mutate the state.
- Use the initializer to pass the state to the button. Use the callback to pass the tap event back.
The communication flow looks next

Summary
Let’s summarize communication patterns between SwiftUI views:
- From parent to direct child – use an initializer.
- From parent to distant child – use
@Environment. - From child to direct parent – use
@Bindingand callbacks. - From child to distant parent – use
PreferenceKey. - Between children – lift the state up.
The number of mechanisms available to pass data between SwiftUI views can first seem overwhelming. But once we put them in a systematic way, they all have unique requirements and usage cases.
Thanks for reading!
If you enjoyed this post, be sure to follow me on Twitter to keep up with the new content. There I write daily on iOS development, programming, and Swift.