Core Data Stack in Swift: Getting Started
Core Data is Apple’s object graph management and persistency framework. When it comes to structured data persistence, Core Data is an obvious choice. The goal of this article is to give you an overview of the Core Data architecture as well as to provide a list of basic operations together with working examples to help you get off to a quick start.
Core Data Architecture
The main building blocks of Core Data are: NSManagedObject, NSManagedObjectModel, NSPersistentStoreCoordinator and NSManagedObjectContext. When connected together, they are usually referred to as a Core Data stack.

NSManagedObject’s are the model objects exposed by Core Data.
NSManagedObjectModel is a database schema that describes the application’s entities. It defines the structure of the managed objects.
NSPersistentStoreCoordinator associates persistent storage and managed object model. It lends itself to mapping the data from the storage, say SQLite data base rows, into the object model. It is a task of high complexity and is often taken for granted when working with Core Data.
What is more, the persistent coordinator is used by the managed object context when it comes to saving or fetching objects.
NSManagedObjectContext controls the life cycle of the managed objects and provides operations to create, save and fetch them. You can think of the managed object context as a scratch pad with a group of managed objects.
Persistent Container
Starting from iOS 10, NSPersistentContainer is responsible for creation and management of the Core Data stack.
NSPersistentContainer exposes a managed object model, a managed object context and a persistent store coordinator as well as provides many convenience methods when working them, especially when it comes to multithreaded applications.
Let’s briefly go through the NSPersistentContainer’s interface.
Initialization
init(name:) initialize NSPersistentContainer with a given name. Make sure it matches with the name of your data model file.
loadPersistentStores(completionHandler:) asynchronously loads persistent stores and fires the completion handler once the stack is ready for use. Must be called after the persistent container has been initialized.
Working with Contexts
newBackgroundContext() creates a private managed object context associated with NSPersistentStoreCoordinator directly.
viewContext a reference to the managed object context associated with the main queue. It is created automatically during the initialization process. This context is directly connected to a NSPersistentStoreCoordinator, thus it might freeze your application when performing heavy operations.
performBackgroundTask(_:) runs passed block on a newly created background context. Each time this method is called, a new background NSManagedObjectContext will be created.
Setting Up the Stack
To be able to use Core Data, we first have to create a data model schema that describes the structure of our data.
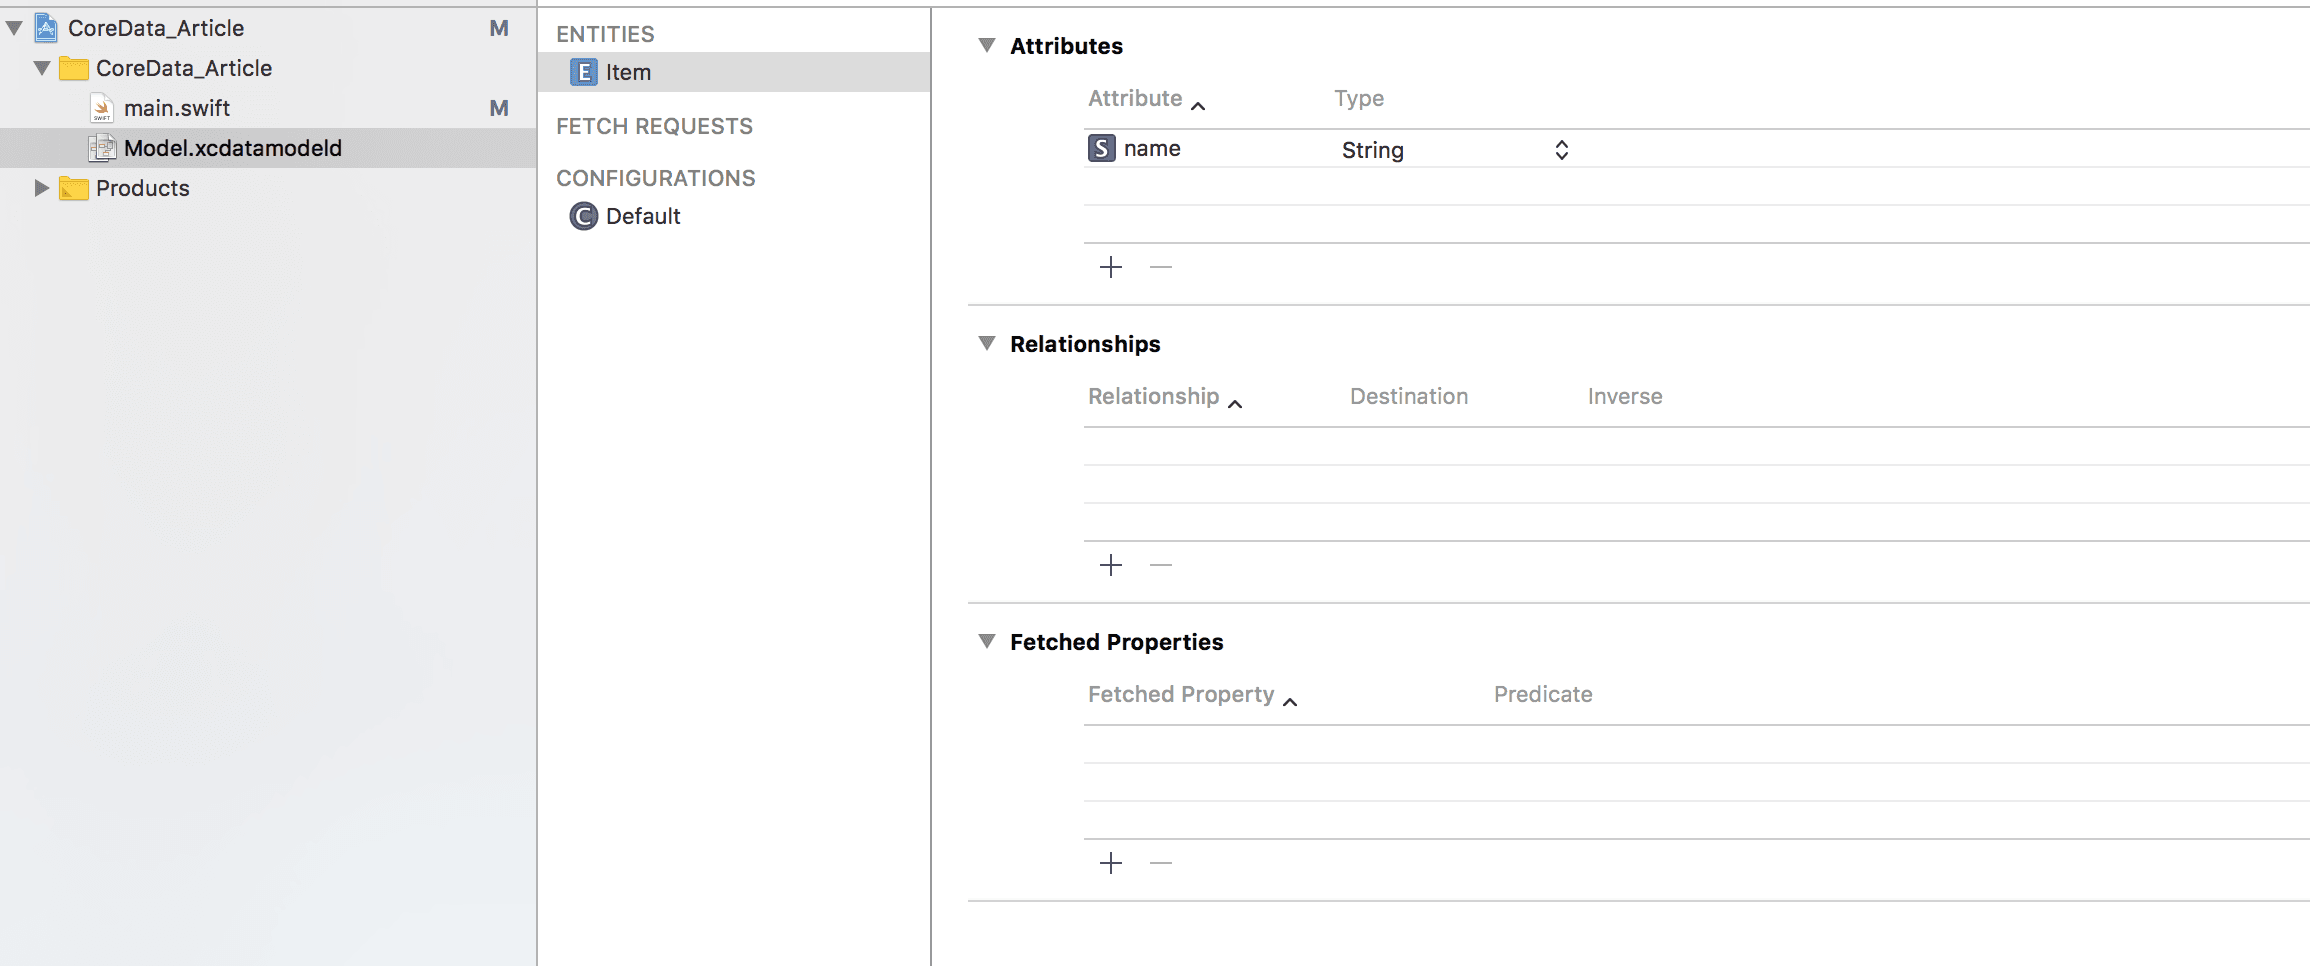
To create a new Data Model file, go to “File > New” and choose “Data Model” from the Core Data section. Then add an entity Item with a single name attribute as shown below.
Having the data model created, we can now initialize the Core Data stack and see how the components play together.
let persistentContainer = NSPersistentContainer(name: "Model")

persistentContainer.loadPersistentStores { storeDescription, error in
    if let error = error {
        assertionFailure(error.localizedDescription)
    }
    print("Core Data stack has been initialized with description: \(storeDescription)")
}
Which prints to console:
Core Data stack has been initialized with description: <NSPersistentStoreDescription: 0x102a69b70> (type: SQLite, url: <...>/CoreData_Article/Model.sqlite)
This means the Core Data stack has been fully initialized and can be used in our app. By default the stack uses an SQLite persistent store, however it can be configured to use other types of storage.
Tip: consider using
InMemorypersistent store for unit tests to ensure that the test data is properly cleaned up and each test is isolated.
Accessing the Context
An NSPersistentStoreCoordinator already comes with a ready for use view context:
let context = persistentContainer.viewContext
Here and next we are using the view context that works on the main queue. Please note that the use of CPU-heavy computations on the main queue will lead to freezes in your app. Consider using
newBackgroundContextorperformBackgroundTask(_:)to perform such tasks in the background.
Creating Entity
As discussed at the beginning, all ManagedObjects live within a managed object context. Thus, to create a new Item instance we have to do this via a context:
let item = NSEntityDescription.insertNewObject(forEntityName: "Item", into: context) as! Item
Saving Entity
Newly created managed objects have all their properties set to nil. Before saving the item to the data base, we will set a name for it:
item.name = "Some item"
try! context.save()
Fetching Entities
Core Data provides a way to construct complex search requests by means of NSFetchRequest. Let’s define a fetch request that returns all saved items and pass it to the managed object context.
let itemsFetchRequest = NSFetchRequest<NSFetchRequestResult>(entityName: "Item")
let fetchedItems = try! context.fetch(itemsFetchRequest) as! [Item]
print("Fetched items: \(fetchedItems)")
This snippet prints:
Fetched items: [<Item: 0x101a59f40> (entity: Item; id: 0x40000b <x-coredata://C13322AF-CF64-4AC4-8DEB-24B3E250A0B3/Item/p1> ; data: {
    name = "Some item";
})]
Core Data does not guarantee any specific order for the fetch results. It is possible to define complex sorting and filtering criterion which is essential when working with Core Data. A more detailed look at this topic is outside of the current article’s scope, so I recommend checking fetch request docs as well as Fetching Managed Objects article by Apple.
Deleting Entity
By now we have saved and fetched an Item instance. Deletion can be done as simple as follows:
context.delete(item)
Rollbacking Deletion
All changes in the managed object context, up to the most recent save, can be undone by means of the rollback method.
context.rollback()
Now the deleted item is back into the context.
Undoing Edition
The undo operation comes in hand when you need to cancel edition of the managed object’s attribute. Let’s change the item’s name and then undo that change:
item.name = "Another name"

print(item.name!)

context.undoManager = UndoManager()
context.undo()

print(item.name!)
Which prints:
Another name
Some item
Source Code
The code snippets from the article can be found in this sample project. You might want to clone it and make some tweaks to get a better understanding of the discussed topics.
Conclusion
We have discussed the components of the Core Data framework and how do they play together.
We have initialized the Core Data stack by means of NSPersistentContainer, which takes lots of responsibilities for the stack creation and management off the developers’ shoulders. We have also performed the basic operations with managed objects, such as save, fetch, delete, rollback and undo.
Even though there are plenty of other complex things Core Data has up on its sleeve, this article makes a nice foundation to get you off to a flying start.
Thanks for reading!
If you enjoyed this post, be sure to follow me on Twitter to keep up with the new content. There I write daily on iOS development, programming, and Swift.